Hey there guys! Macro photography is all about capturing those super tiny details in life – think of close-up shots of flowers, insects, or even everyday objects that look completely different when zoomed in. But, to really nail those shots, you’ve gotta know your camera settings inside out.
Don’t worry, though; I’m here to help you out. Today, Im about to break down three crucial elements that’ll make or break your macro shots: Camera Mode, Aperture, and Flash settings.
So, if you are curious about the best settings for macro photography, here I will share it for you guys.
Best Camera Settings for Macro Photography
1. Camera Mode
Now, choosing the right camera mode is a big deal in macro photography. Why? Because this determines how much control you have over the camera’s settings, and trust me, you’ll want all the control you can get when you’re zooming in super close.
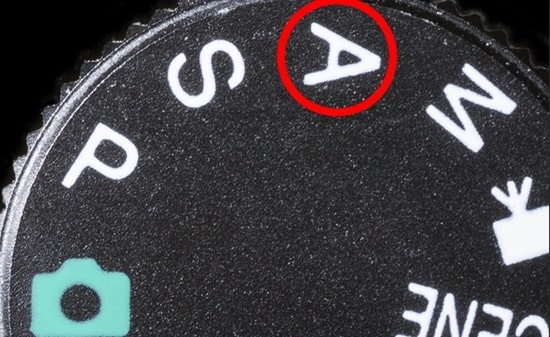
Aperture Priority Mode (A or AV on your camera)

This one’s great if you’re working with natural light, like sunlight or any kind of ambient light. It lets you decide the aperture (we’ll talk more about this later), and the camera adjusts the shutter speed for you.
The cool part is that you get to control how much of your subject is in focus, which is key for macro photography. But heads up, if the light isn’t strong enough, things might get a little tricky without a flash.
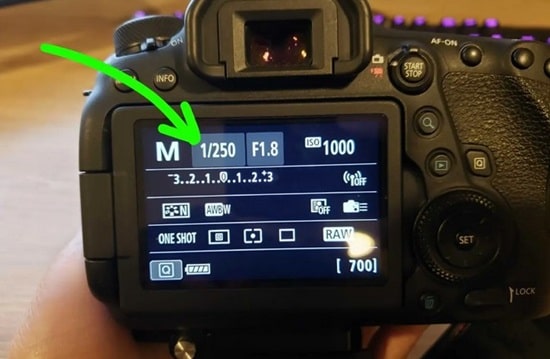
Manual Mode (M on your camera)
Ah, the control freak’s favorite! And honestly, when it comes to macro photography, you’re gonna want to be that control freak. Manual mode lets you set both the aperture and the shutter speed exactly how you want them.
This is especially important if you’re using a flash or doing tripod shots where you stack multiple images together for a wider depth of field (fancy term for more of your subject being sharp and in focus). It’s a bit more work, but if you’re serious about getting top-notch macro shots, this is the mode for you.
Avoid These
- Macro or Close-Up Scene Modes
Yeah, some cameras have these, but honestly, they’re not flexible enough. You don’t want the camera deciding what settings to use in macro situations. - Shutter Priority Mode
It might seem tempting, but the last thing you want is for your aperture to be jumping around every time you move in and out of shadows. You need to be the boss of that aperture!
2. Aperture
Okay, let’s talk about aperture. This setting is probably the most critical part of macro photography. The aperture is basically the size of the hole inside your lens that lets light through.
It’s measured in f-stops, and it directly controls the depth of field – that’s the amount of your image that’s in sharp focus.
Here’s the thing: macro photography has an extremely shallow depth of field. Like, we’re talking paper thin. You could be photographing an ant, and only its tiny head is sharp while the rest is blurry.
That’s how shallow it gets. So, choosing the right aperture is super important to make sure you get the details you want.
So, what’s the best aperture for macro photography?
- With a Flash:
When you’ve got enough light, thanks to a flash, you can use a smaller aperture (which means a higher f-stop number like f/16 or even f/22).
This narrows the aperture, but it also gives you more depth of field, meaning more of your subject is in focus. Perfect for those super close shots. - Without a Flash:
If you’re not using a flash, you’ll need to open up the aperture to let in more light. So, you might be using something like f/5.6 or f/8.
This will give you a much shallower depth of field, so only a tiny part of your subject will be sharp.
But, as with all things photography, it’s not just about the numbers. Your aperture also depends on the size of your camera sensor, how close you are to the subject, and even the brand of your camera (yup, some brands handle aperture calculations differently when you’re super zoomed in).
It’s a bit of a balancing act, but once you find the sweet spot, your macro shots will go from meh to whoa!.
3. Flash
Ah, the flash – your best friend and sometimes, your worst enemy in macro photography. Here’s the deal: because you’re working with such small depths of field and often in tricky lighting, a flash is almost always necessary, especially for those high-magnification shots.
When you’re using smaller apertures like f/16, your camera needs a lot of light to properly expose the shot. A flash helps provide that extra light.
Plus, it helps freeze any motion, whether it’s your hand shaking or your subject moving around (insects, I’m looking at you). Without a flash, your photos are more likely to end up blurry or underexposed.
How to Set Up Your Flash
- The best setup is to use automatic (TTL) flash while keeping your camera in manual mode. This way, you get to choose the aperture for that perfect depth of field, and your camera adjusts the flash power to compensate for lighting changes. It’s a win-win.
- You might need to fiddle with flash exposure compensation. When you’re shooting high-magnification photos, you often need to crank up the flash compensation by +2 or +3 stops to get enough light.
Softening the Flash
Now, direct flash can be a bit harsh for macro photography. It can create these glaring, shiny spots on your subject that totally mess up the shot.
That’s where a flash diffuser comes in. It softens the light, giving you more even, flattering illumination. Don’t have a diffuser? No worries! You can DIY one with some tape, cardboard, and a paper towel. Seriously, it works like a charm.
When using a flash in macro photography, you’ll notice that the background might turn really dark or even pitch black. This happens because your subject is super close to the flash and gets all the light, while the background, being farther away, stays in the dark.
It’s not necessarily a bad thing – it can actually make your subject pop more – but just something to be aware of.
4. Shutter Speed
Alright, let’s explore shutter speed. Especially when you are working with small subjects and enlarged details, shutter speed is crucial in macro photography in deciding how sharp or blurry your photo turns out.
With Flash
Your shutter speed is less crucial in macro photography if you are utilizing a flash than in other kinds of photography. For what purpose? Well, most of the heavy work in freezing motion comes from the flash.

Usually far faster than the shutter speed of your camera, the flash fires only for a fraction of a second. Your flash guarantees that everything is sharp even if your shutter speed is set at something like 1/200 or 1/250 seconds—usually the highest sync speed for most cameras.
This implies that rather than controlling the brightness from your flash, the shutter speed just regulates the ambient light in your picture. Set it to let the flash handle all the work and block off the natural light.
Hence the outcome is even in dark settings, a well-lit, sharp image is essential.
Without Flash
Now, if you’re not using a flash, the shutter speed becomes way more important. In macro photography, even the smallest camera motion can cause fuzzy photographs while you are shooting close range.
And believe me, it’s rather annoying to land a wonderful setup only to discover motion blur destroys your shot.
Using a quick shutter speed will help you to avoid this. Generally speaking, especially if you are handholding your camera, keep to at least 1/320 seconds.
Should your topic be moving—that of a bee or butterfly—you may require an even quicker speed, say 1/500 seconds or more.
The drawback is that the faster your shutter speed, the less light strikes your camera sensor, so you may have to expand your aperture or raise your ISO to offset. Not to fear, though; we will discuss ISO more going forward.
5. ISO
Alright, now onto ISO, which in macro photography may be a little balancing act. ISO decides the sensor’s light sensitivity of your camera.
Your image gets brighter and it is more sensitive the higher the ISO. But—and this is a major but—your shot will show more noise (grain) the higher the ISO.
Nobody particularly enjoys a blurry, noisy macro photo.
ISO with Flash
Your ISO setting while utilizing a flash is tightly linked to the power of the flash. Your camera may struggle to get enough light on the subject if you are shooting with a flash and a tight aperture (such as f/16).
The trick is: Usually somewhere between ISO 100 and ISO 800, set your flash to manual mode at 1/4 power and then pick an ISO value that provides a good exposure. After that is under order, you can return to auto (TTL) mode on your flash.
Your camera will now be able to maintain the flash power around one-fourth, providing regularly well-lit images.
This approach works fantastic since it lets your flash recycle faster (which means you can take more pictures fast), and your ISO stays within a range that won’t add too much noise into your pics.
ISO without flash
Should you be shooting without a flash, ISO turns become your friend. Recall our discussion about the importance of a fast shutter speed to prevent blur.
You will therefore have to raise your ISO to provide adequate light into your camera without a flash.
Macro photography under an ISO of 800 to 3200 is not unusual when you are depending just on natural light. But be aware: you will introduce more noise the higher your ISO.
The secret is to discover that sweet spot where your images are clear and sharp yet sufficiently brilliant.
Setting your camera to Auto ISO will help you to simplify things. This setting allows you to choose a minimum shutter speed—say, 1/320 seconds—and a base ISO—say, ISO 100.
After that, your camera will automatically change the ISO as necessary to maintain shutter speed fast enough for sharp images without too much work on your side. This small tip helps you avoid always tinkering with settings!
6. Focusing

Let us now discuss focussing, which is most likely the toughest aspect of macro photography. Given your work with such little details and razor-thin depth of view, finding the correct focus can seem like a bit of an artistic endeavor.
Still, practice makes it simpler; therefore, relax!
Continuous Autofocus for Larger Subjects
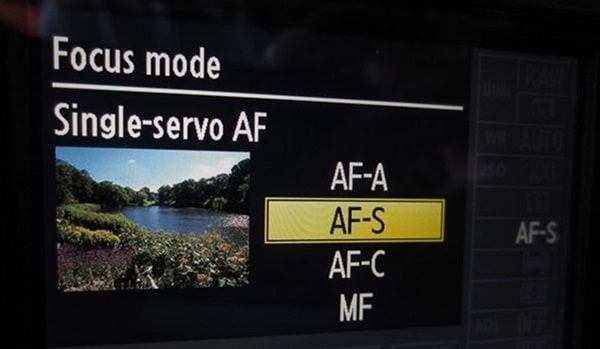
Continuous focusing (AF-C) can be quite helpful if you are capturing bigger things, such as flowers or larger insects and you are not zoomed in extremely close. This scene lets your camera change focus continuously as your subject moves.
For busy objects, such as butterflies, where you have little time to deliberately concentrate, it is very helpful.
Manual Focus for High-Magnification Shots
Autofocus often suffers, though, when you’re working at large magnitudes—that is, in trying to capture the smallest details. Your best bet at this stage is to turn to manual focus.
I prefer to do this: After fixing your lens, gently swing your body (or the camera) forth and backwards until the subject comes into focus. Though this method sounds a bit traditional, especially considering that you are working with a limited depth of vision, it works very nicely.
And keep going after just one shot! Quickly succession of several pictures is advisable. Here the theory is that, throughout several shots, the little movement of your body could highlight certain aspects of your subject.
Later, while looking over your pictures, you can choose the sharpest one (or mix them in post-processing for focus stacking).
Conclusion
Phew, that was a lot to cover, but here’s the bottom line: Macro photography is all about precision. Every tiny movement or change in light can make or break your shot.
But when you master settings like shutter speed, ISO, and focusing, you’re setting yourself up for success.
Take your time to practice, experiment with these settings, and find what works best for your style. Macro photography might seem tricky at first, but once you get the hang of it, the results are more than worth it.
So, grab your camera, get out there, and start capturing those tiny, hidden worlds around you.

