Photographing fireworks can be super exciting, but without the right preparation, you might find yourself struggling to capture those vibrant bursts in the night sky.
Whether you’re using a smartphone or a professional camera, a bit of planning and the right equipment will make a huge difference in your final results. So, before you head out to that epic fireworks show, let’s dive into what you’ll need to bring along.
Trust me, it’s not as complicated as it sounds – just a few essentials can take your fireworks photography from “meh” to magical!
What You Need to Bring
1. Tripod
A tripod is, without a doubt, the MVP of fireworks photography. Why? Because fireworks are fleeting, and capturing them means using longer exposure times, which are impossible to do by hand without getting blurry shots.
Even if you’re shooting with just your phone, a tripod can transform your results from shaky messes into crisp, magical bursts of light. The best part? You don’t need a fancy tripod – even a small, portable one will do the trick!
If you’ve ever thought, “I can skip the tripod”, think again. This one piece of gear makes all the difference.
2. Camera
Any camera that allows manual controls will do just fine for fireworks photography. If you have a DSLR or mirrorless camera, you’re golden! But even a simple point-and-shoot can handle the job as long as it has manual mode.
Smartphones? Yep, they work too! Just make sure to pair them with a tripod and an app that allows long exposures. You don’t need the latest, most expensive gear – fireworks are more about timing and technique than the fanciest equipment.
3. Lenses
If you’re using a camera with interchangeable lenses, bring both a wide-angle lens (like a 24-70mm zoom) and a telephoto lens (like 70-200mm). Why two lenses? A wide lens captures the entire scene, including any foreground elements like buildings or people watching the show.
Meanwhile, a telephoto zoom allows you to get up close to the fireworks, even if you’re far from the action. The flexibility of zoom lenses is a big plus, especially since you won’t want to run around trying to adjust your position mid-show.
4. Remote Shutter Release
While not mandatory, a remote shutter release makes life so much easier when photographing fireworks. It helps you avoid camera shake caused by pressing the shutter button, especially with long exposures.
If you don’t have a remote, no worries – just use the self-timer feature on your camera. That way, you can step back and let your camera do its thing without interference.
5. Memory Cards
There’s nothing worse than realizing your memory card is full in the middle of a fireworks display. Fireworks photography often means taking a lot of shots to capture just the right moment.
So, bring more than one empty memory card. It’s better to have extras than miss the grand finale because you ran out of storage!
6. Spare Battery
Running out of battery power mid-shoot can be a real buzzkill. If you’ll be shooting for an extended period or in cold weather, carry a spare battery.
Low temperatures can drain batteries faster than usual, and you don’t want your camera to die just when the fireworks hit their peak.
7. Flashlight
Since fireworks shows usually happen in the dark, a small flashlight can be a lifesaver. It’s useful for finding camera buttons, adjusting settings, or checking your tripod’s stability.
If you plan to shoot with a foreground subject (like a monument or a person), you might also use the flashlight to help focus your camera more accurately before the fireworks start.
Camera Basics
The best thing is that fantastic fireworks pictures may be taken with no professional camera required. Any camera allowing manual setting adjustment will function exactly as intended.
That implies most point-of- view cameras, DSLRs, and mirrorless cameras are fit for the work. With with knowledge, even a smartphone can produce amazing effects.
If you use a phone, search for an app allowing long exposures, manual mode, or prolonged shutter speeds. There are many both free and paid choices available right now.
It makes little difference which app you use; the important thing is to ensure you have control over exposure levels. Couple your phone with a tripod to enable you to follow the identical methods we will go over in this lesson.
The nice thing about fireworks photography is that your camera’s restrictions won’t cause too much concern. Even more ancient or entry-level cameras can produce excellent results since you will be using the base ISO of your camera—usually ISO 100.
And relax if you are not comfortable with hand settings. Many cameras provide a “Fireworks Mode”, a basic approach to begin going without immediately entering manual mode.
Lens
With regard to lenses, flexibility is everything. Bring both a telephoto zoom (like 70-300mm) and a wide-angle zoom lens (such as 18-55mm).

While a telephoto zoom is fantastic for isolating particular bursts of pyrotechnics in the sky, a wide lens permits you to see the whole picture.
Though less flexible since you cannot zoom in or out, prime lenses—those with fixed focal lengths—can also operate. Conversely, zoom lenses allow you to adjust your composition without having to walk around, which is rather convenient during a fast-moving fireworks display.
You also have no reason to be concerned about an extremely wide aperture lens. Any good zoom lens would do as you probably shoot at f/8 or f/11.
Tripod
Most fireworks images call for lengthy exposures, hence a tripod is absolutely necessary. We are talking about several seconds or more.
Your pictures will be almost likely fuzzy without a tripod. Sharp images with extended exposure times cannot be obtained even by resting your camera on a steady surface such as a wall or chair.
The great news is You do not need a pricey, top-of- the-line tripod. Unless you are filming in really windy circumstances, a simple model will be quite good.
Should stability concern you, consider dragging your tripod down with a sandbag or backpack.
If you have a remote shutter release, utilize it to even more reduce camera wobble. If not, turning your camera to self-timer will help; simply give yourself a few seconds to move away from the camera before each shot.
Camera Settings for Photographing Fireworks

Getting great pictures of fireworks depends more on perfecting the camera settings than on just having the correct gear. Fireworks behave erratically, hence early calibration of your settings allows you the freedom to change on demand without missing the magic.
I will walk you through some useful camera settings below and provide advice to guarantee you leave with amazing, well-exposed photographs every time.
Flash
First things first: turn off the flash. Fireworks are their own source of light, and adding flash will only interfere with the scene. You’re aiming to capture the vibrant bursts in the night sky, not illuminate objects nearby.
Flash will do more harm than good, so leave it off entirely.
Manual Mode
For the best results, switch your camera to Manual mode. Many cameras also have a “Fireworks Mode”, which is a great starting point if you’re new to manual settings.
However, keep in mind that Fireworks Mode limits your control, so once you feel comfortable, it’s better to switch to Manual for maximum flexibility.
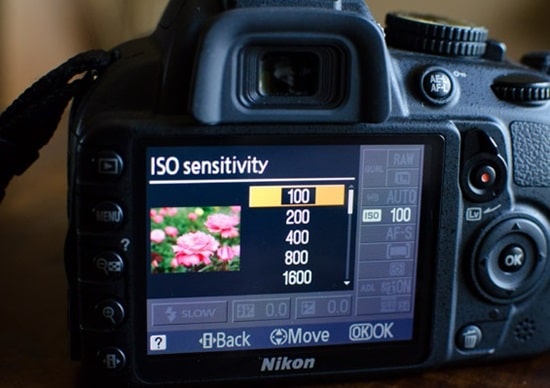
1. ISO
Set your camera to its base ISO—usually ISO 100 or ISO 200. This helps reduce noise and ensures the cleanest possible image.

Make sure Auto ISO is turned off to prevent the camera from adjusting it unexpectedly, which could overexpose your shot.
2. Shutter Speed
The shutter speed has the biggest impact on the look of your fireworks photos. Start with 3 seconds as a baseline.
- Want more fireworks? Use a longer shutter speed (10–30 seconds) to capture multiple bursts in one frame.
- Prefer smaller bursts or more precise captures? Use a shorter shutter speed (like 1–2 seconds).
Experimenting between 1 to 6 seconds gives you a good variety of effects to choose from. Be mindful, though: long exposures can pick up too much motion, especially if it’s windy or there’s heavy smoke.
3. Aperture
Aperture determines how much light enters your lens. Start at f/8 for a good balance.
- If the fireworks are too bright, stop down to f/11 or f/16.
- If the fireworks are too dim, open up to f/5.6 or f/4.
Since you’re shooting from a distance, depth of field isn’t a big issue, so your main goal is to control the brightness.
4. Image Format
If your camera allows it, shoot in RAW format. RAW files give you much more flexibility during editing, especially when it comes to recovering highlights and shadows.
If RAW isn’t an option, JPEG works too—just make sure your other settings are on point to minimize the need for heavy post-processing.
5. White Balance
- Shooting in RAW? Set White Balance to Auto—you can always adjust it later in editing.
- Shooting in JPEG? Use Daylight white balance, which tends to work well with the warm tones of fireworks.
6. Long Exposure Noise Reduction
Turn off Long Exposure Noise Reduction. While this feature can be useful for night photography, it doubles the time your camera takes to process each shot—leaving you with fewer chances to catch the perfect moment.
7. Metering Mode
Since you’ll be working in Manual mode, metering isn’t crucial. Just leave it on the default matrix/evaluative metering.
8. Image Stabilization
If your camera or lens has image stabilization, switch it off when using a tripod. Stabilization isn’t helpful for long exposures on a stable surface and can sometimes introduce unintended shake.
Mastering Shutter Speed: The Heart of Fireworks Photography
Shutter speed is one of the most critical settings for fireworks photography because it controls how much action you capture in each shot.
- Longer shutter speeds (10-30 seconds):
These work great for combining multiple bursts in a single frame. However, too long of an exposure can result in cluttered or smoky images, especially if the wind isn’t in your favor. - Shorter shutter speeds (1-2 seconds):
Use these if you want to capture just one or two bursts at a time. Shorter exposures can also prevent your images from becoming too overwhelming during shows with a lot of fireworks firing at once.
For the “grand finale” phase of a fireworks show, it’s smart to reduce your shutter speed (even as low as 1/2 second) to avoid overexposure. The finale is typically brighter and more chaotic, so adjusting your settings ensures that the colors and shapes stay crisp.
Watch Out for Smoke
As the fireworks show progresses, smoke buildup can become a challenge, especially if the wind isn’t dispersing it away from your scene. Long exposures (10 seconds or more) will accumulate light from the smoke, making it look more visible in your shot.
If this happens, try:
- Using shorter shutter speeds to reduce the impact of smoke.
- Changing your angle to avoid shooting directly into the smoke cloud.
Dealing with Foreground Brightness
Sometimes the foreground elements (like a building or a crowd) can appear too bright compared to the fireworks. Here’s a quick trick:
- Take two photos—one properly exposed for the foreground and one for the fireworks.
- Blend the images later in post-processing using Photoshop or any editing software with layers and masks. This way, you can get the best of both worlds without compromising on exposure.
Conclusion
Fireworks photography is all about experimentation. There’s no perfect formula that works every time because every show is different. The good news is that by understanding the impact of settings like shutter speed, aperture, and ISO, you’ll be able to adapt quickly and capture the magic in front of you.
Get your gear ready, head out early to secure a good spot, and don’t be afraid to try different settings throughout the show.

