Whether your passion is simply catching the wonderful events of life or you are a professional behind the camera, you have most likely heard of this enchanted word: bokeh. But really what is it?
Why do photographers adore it? Well, let’s explore the realm of blurred backgrounds, dreamy lights, and how bokeh could improve your photography skills somewhat.
Imagine yourself snapping a picture of a pal in front of a nighttime street lined with glittering lights. Your camera concentrates exactly on their joyful face, while in the background the lights blend into lovely, soft, luminous orbs.
That neat blur? We term that bokeh, my friend! Though it sounds elegant, this is basically about finding that beautiful, out-of-focus area in your picture that accentuates your subject and gives the picture some artistic value.
Why then is this relevant now? Great bokeh, then, may transform an average picture into something rather striking. It adds a little bit of mood or drama to your images, helps highlight the main idea, and generates depth.
Often a photographer’s ideal, it’s that silky, smooth blur that causes backdrops to melt away into creamy oblivion while leaving your subject clean and distinct. Therefore, learning the technique of bokeh will help your images to have a completely different mood whether you’re photographing portraits, macro views, or even nature scenes.
So What is Bokeh?
What then precisely is this beautiful phenomena known as bokeh? Though you didn’t know the word, you most likely have seen it in action before. From the Japanese term “boke”, which meaning blur or haze, the word “bokeh” derives.
In photography, it particularly speaks to the quality of an image’s out-of-focus portions. Not just any blur, though either. Bokeh is mostly about the blur’s visual quality—that which makes it appealing and smooth.
Consider it as follows: certain blurs may be a touch sharp or startling, while others are soft and creamy, much like a picture. The intention is to build that soft, aesthetically pleasing background that gives your picture some artistic flair.
How therefore does bokeh take place? It’s all about how the lens treats the areas of out-of-focus. When light passes through the lens and the focus falls on a subject, the background tends to blur out, depending on the aperture setting, focal length, and lens design.
When done correctly, this blur produces those exquisite orbs or soft-edged forms seen in the background of pictures, particularly in images containing small sources of light such as streetlights, fairy lights, or sunlight passing through plants.
Better the bokeh the more rounder and smoother those blurred forms are.
Good bokeh is produced by some lenses more than by others. Usually the go-to for obtaining that dreamy background blur are wide apertures lenses such as f/1.4 or f/1.8.
It also relates to the aperture blades; rounded blades typically provide rounder, smoother bokeh, whereas more angular blades could produce hexagons. Therefore, when people discuss “good bokeh”, they are referring to the smooth, almost buttery blur that accentuates the subject of the picture rather than distracting element.
8 Tips for Better Bokeh in Photography
Alright, guys, if you’re as obsessed with bokeh as I am, you know that getting that perfect, buttery smooth blur isn’t just luck—it’s all about technique, the right gear, and a bit of creativity.
So here they are, tips to help you get the kind of bokeh..
1. Choose the Right Lens
First things first, the lens you use is a huge factor in creating beautiful bokeh. Not all lenses are created equal when it comes to bokeh, and the type of lens you have can make or break your background blur.
Typically, prime lenses (those with fixed focal lengths) are the kings of bokeh, especially ones with wide apertures like f/1.2, f/1.4, or f/1.8.

Portrait lenses, such as an 85mm or 50mm with a wide aperture, are particularly known for their stunning bokeh. Why? Because wide apertures let in more light and allow for a shallower depth of field, meaning the background will be more blurred.
So, if you’re serious about getting that creamy bokeh, investing in a good lens can make a world of difference. Bonus tip: pay attention to the number and shape of the aperture blades in your lens—the more rounded they are, the smoother your bokeh will be.
2. Use a Wide Aperture
Now that we’ve talked about lenses, let’s dive into one of the most important settings: aperture. If you want that signature blurred background, you’ve got to open up your aperture as wide as it’ll go.

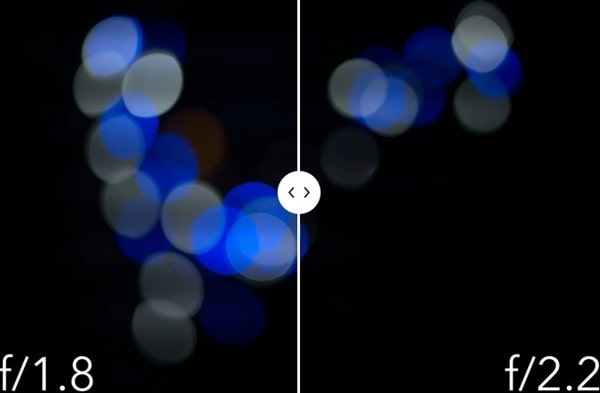
The wider the aperture (lower f-number, like f/1.4 or f/2.8), the more shallow your depth of field will be, which means more blur in the background and more bokeh magic!
But, here’s the thing: don’t always assume that shooting wide open is the best move for every situation. Sometimes, stopping down just a tiny bit—say, from f/1.4 to f/2.0—can result in more uniform bokeh circles and cleaner results, especially around the edges of your frame.
Play around with it and see what works best for your subject and environment.
3. Increase the Distance Between Subject and Background
If you really want that creamy bokeh to shine, create distance between your subject and the background. The farther your subject is from the background, the more out-of-focus and smooth the background will appear.
This is a great trick when you’re working with environments that are a bit cluttered or distracting—you can essentially ‘erase’ the background with bokeh by separating your subject from it.
Imagine you’re shooting a portrait in a park. If your subject is standing right in front of a tree, that tree might still be too defined and take attention away from the person.
But if you move them forward, away from the tree, you’ll notice that the tree melts into a soft, creamy blur that enhances the photo instead of distracting from it.
4. Shoot Close to Your Subject
This tip goes hand-in-hand with creating distance from the background: get closer to your subject. The closer you are to the subject, the more pronounced the background blur will be.
This is especially true when using a lens with a wide aperture. Macro photographers know this all too well—shooting up close creates a dramatic depth of field and can make even small details stand out against a beautifully blurred background.
So, whether you’re capturing the sparkle in someone’s eyes or the delicate details of a flower, moving closer to your subject will help isolate it from the background and give you that gorgeous bokeh effect.
5. Look for Specular Highlights
If you’ve ever seen bokeh that looks like little glowing orbs of light, you’ve probably come across what’s known as specular highlights. These are points of light in the background—like sunlight filtering through leaves, streetlights at night, or reflections off water—that appear as circular spots when out of focus.
Specular highlights can add a magical, dreamy quality to your bokeh.
To take advantage of this, try shooting in environments where you have small light sources in the background. For instance, during golden hour when the sun is low and filtering through trees, or at night when streetlights and city lights are present.
These tiny points of light will turn into those mesmerizing orbs we all love in bokeh-filled photos.
6. Keep Your Gear Clean
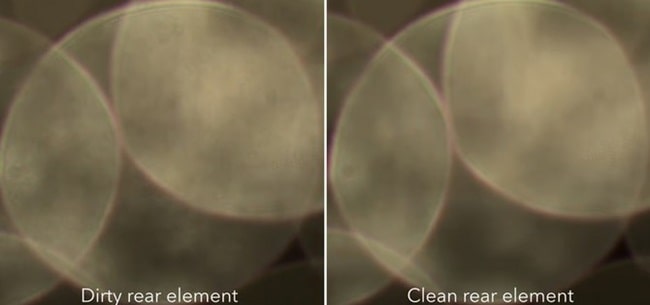
This one might seem obvious, but it’s worth repeating: clean your gear! Dust, dirt, and smudges on your lens or sensor can show up in your photos, especially when shooting with wide apertures.

Even the most stunning bokeh can be ruined by a few stray dust spots.
So, take a few minutes before each shoot to give your lens and camera a quick clean. Make sure your sensor is dust-free, and if you spot any smudges or fingerprints on your lens, give it a good wipe with a lens cloth.
Trust me, you’ll thank yourself later when your bokeh shots come out pristine and free of unwanted blemishes.
7. Reduce Noise in Your Photos
When we talk about bokeh, we often focus on the lens and aperture, but let’s not forget about another enemy of smooth, creamy backgrounds: noise. Noise, especially in low-light photography, can add a grainy texture to your bokeh, which is the opposite of what we’re going for.
To minimize noise, try to keep your ISO as low as possible. If you’re shooting in low light, consider using a tripod or a slower shutter speed rather than cranking up the ISO too high.
Additionally, in post-processing, you can use noise reduction software to help smooth out any remaining graininess while keeping your bokeh nice and clean.
8. Experiment with Specialty Lenses
Finally, for those of you looking to push the boundaries of your bokeh game, consider trying out specialty lenses designed specifically for unique bokeh effects. Some lenses, like the famous Laowa 105mm f/2 STF (Smooth Trans Focus), are engineered to produce exceptionally smooth bokeh by using special optical elements like an apodization filter.
Other lenses, like the Canon RF 85mm f/1.2, have coatings that soften the edges of highlights, giving a more diffused look to the bokeh.
These specialty lenses often come with a price tag, but for bokeh lovers, they can be worth the investment. They allow for even more control over the aesthetic quality of the blur, making it easier to achieve that dreamy, artistic look that everyone craves.
Conclusion
Alright, so by now you most likely understand that bokeh is almost like an artistic form rather than only a technical consideration of photography. By adding depth, guiding the viewer’s eye to the subject, and producing that wonderfully blurry background that photographers aim for, it may transform your images from decent to great.
Learning bokeh can help you to really add that unique touch to your images whether your focus is on close-up details, portrait photography, or catching amazing light in the natural world.
Bokeh is ultimately about establishing a mood and a sense of concentration inside your image. It guides the audience’s attention exactly where you wish it, so enabling you to create a tale.
Besides, done well, it simply looks absolutely fantastic! Go out there, play about with various apertures, try on your lenses, and see how you might find bokeh to work for you. It’s all part of the enjoyment of photography; once you get the hang of it, you will literally start seeing your pictures in a completely different perspective.

