Cityscapes are undeniably fascinating, aren’t they? There’s something about towering buildings, bustling streets, and intricate architectural designs that just makes us want to capture every single detail in a photograph.
But if you’re a beginner trying to dive into cityscape photography, you might be feeling a bit overwhelmed by all the things you need to consider—like camera angles, lenses, lighting, and so much more. But don’t worry, with the right guidance, you’ll soon be snapping some stunning shots of the urban jungle.
This time I will provide an easy-to-understand beginner’s guide to some key cityscape photography tips to help you improve your skills. Whether you’re exploring the streets of a small town or trying to photograph the skyscrapers of a bustling metropolis, these tips will give you a solid foundation to start creating some stunning shots.
Cityscape Photography Tips for Beginners
1. Eliminate Distractions
Okay, let’s be real—cities are chaotic, right? There’s so much going on at any given moment: cars zooming by, people rushing down the sidewalks, flashing lights, towering billboards, and endless rows of buildings crammed together.
It’s beautiful, yes, but also incredibly busy. When it comes to cityscape photography, one of the biggest challenges is figuring out how to eliminate distractions and focus on your main subject.
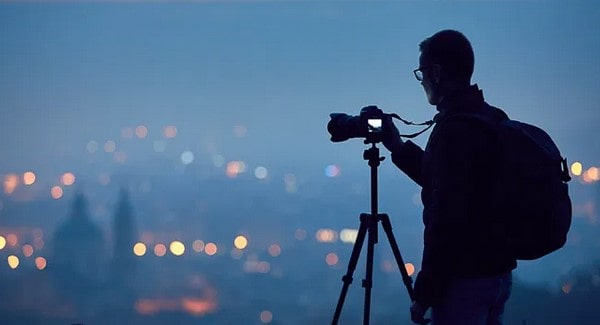
But don’t worry, even in the most hectic of environments, there are some techniques to help you clean up your shots and draw attention to what really matters in the frame. For starters, one of the easiest ways to minimize distractions is by finding a higher vantage point.
Climbing up to a bridge, rooftop, or staircase can help you rise above the chaos and give you a clearer, more organized perspective. This not only provides a better angle for your shot but also naturally reduces the number of distractions in the foreground, like cars or pedestrians.
Another handy trick is to use a telephoto lens. This will help you to zoom in on specific subjects and block out everything else.
By focusing on one building, one section of the skyline, or a specific architectural detail, you can create a much cleaner and more intentional image. Plus, using a telephoto lens allows you to isolate your subject without having to physically move closer, which can be a lifesaver in crowded areas.
And hey, don’t underestimate the power of long exposure photography. Let’s say you’re in a busy part of the city with tons of movement—cars, buses, and people everywhere.
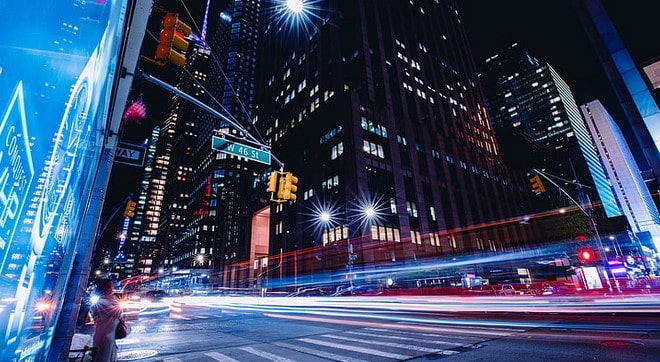
By using a long exposure, you can blur out those moving elements, making them disappear into smooth streaks of light or ghostly figures. This adds a dynamic element to your shot while simultaneously eliminating some of the clutter.
If you’ve taken a great shot but there are still some distracting elements lingering around the edges, don’t be afraid to crop them out during post-production. Just because something is in the original frame doesn’t mean it needs to stay there.
Tightening the crop can sometimes make a world of difference in clarifying the focus of your image.
2. Position Your Back to the Sun
Here’s a basic but really powerful tip: when shooting cityscapes, always angle your back to the sun. Ask why, then? Sunlight can, thus, be your friend as well as your deadliest enemy.
Often you find underexposed subjects, blown-out highlights, or harsh shadows when you shoot straight toward the sun. Not what you want for a breathtaking cityscape picture when buildings seem black, flat, and devoid of details.
Make sure the sun either behind you or at least to the side. This will ensure that your subject is uniformly illuminated by the sunlight, therefore accentuating all the amazing architectural textures and intricacies.
More clarity will abound from buildings, and underexposure or blown highlights won’t cause as much trouble. Moreover, the sky will frequently be a more vivid blue when the sun is behind you, thereby providing an amazing background for your picture.
Of course, now days there are exceptions to every rule. For instance, the light is soft and pleasant during golden hour, the period shortly following sunrise or before sunset, which makes even direct sunlight considerably more controllable.
Generally speaking, though, keeping your back to the sun is a healthy habit to develop, particularly if you are just beginning.
3. Get Elevated
Regarding cityscape photography, perhaps the best views come from above rather than from street level. Rising can let you get breathtaking, panoramic vistas that are just unachievable from the ground and provide a fresh viewpoint on a place.
When you’re high, you can see how the city stretches out: rivers or beaches frame the urban sprawl, roads slink through communities, and skyscrapers puncturing the heavens. It offers a whole different approach of seeing the city.
How then might one acquire that heightened perspective? There are a few possibilities. Many of the buildings in cities you might be lucky enough to live near have public observation decks.
Many times offering some of the best views in the city, these decks provide you an unobstructed perspective of the skyline free from any obstacles. Just make sure to visit at the proper time of day to avoid crowds and maximize your lighting (pro tip: early mornings or just before sunset are frequently the ideal times).
Look for natural elevations surrounding the city if you are not into tall buildings. Excellent panoramic views can come from hills, mountains, even big parks with raised perspectives.
The city will be seen from a completely different perspective, and the extra height will help your pictures to have majesty and scale that is difficult from ground level.
Another choice is to have access to rooftops—by friend, Airbnb, or even a hotel featuring a rooftop bar or club. Although they still offer that higher viewpoint, rooftops give a more personal, immersive picture of the city.
Plus, they’re often less crowded than observation decks, allowing you more time and space to set up the perfect shot.
4. Incorporate Water Elements

Water is among the elements in cityscape photography that is least appreciated. Many towns are developed next rivers, lakes, or oceans; including these bodies of water into your photographs will give your images a whole fresh perspective.
Water may produce reflections, provide motion, and aid to simplify difficult scenes, therefore giving your images a more calm, balanced feel.
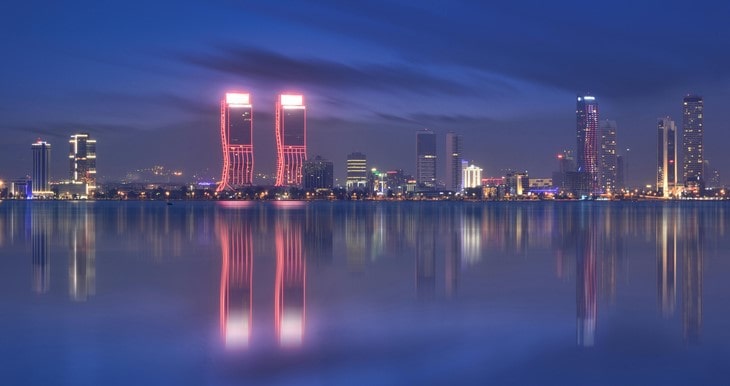
Including water in your cityscapes most obviously helps with reflections. Usually during the blue hour or early morning, buildings and bridges reflected on still water can produce a mirror-like effect adding depth and symmetry to your images when the light is appropriate.
Reflections can make an ordinary cityscape picture visually stunning, whether it is a lake, a river, or simply a puddle following a rainfall.
Water, though, is not limited to reflections. It can also give your work some lively variation. For instance, the flow of the water might give your picture vitality and life if you are photographing close to a river or the sea with strong currents.
Long exposure can transform chopped waves into silky smooth textures, giving your image dreamy character. Alternatively, if you live close to a busy harbour, the boats gliding across the sea can act as leading lines, pointing the observer’s eye across the frame.
Water also helps to cut distractions from your pictures. Clear, open areas can be difficult to locate in a crowded metropolis.
But water inherently produces a more open, uncluttered foreground that lets your main subject—the skyline, a bridge, or a landmark—stand out more clearly. Your images will seem more calm and less chaotic if you simply yet effectively create breathing room in them.
5. Keep Your Lines Straight
Starting to shoot cityscapes will first let you realize how important it is to maintain your lines straight. Although this sounds somewhat straightforward now, trust me; it’s not easy said.
Whether they are the horizon line in the backdrop or the edge of a skyscraper, buildings and city structures abound with straight lines. The issue is? Carelessness can cause those lines to slant, therefore distorting the whole picture.
Two often occurring problems here are keystoning and slanted horizons. When your camera is not exactly horizontal, you have a tilted horizon.
Most pictures you have probably seen have everything slanted to one side. Though you may quite readily correct it in post-production, it is hardly the end of the earth.
But maintaining a level camera while you’re filming will save time and provide higher starting image quality.
One of the trickiest is keystoning. It occurs primarily with a wide-angle lens when you point your camera upward or down. Those exactly straight lines suddenly begin to converge toward the center, and your constructions may seem to be leaning or collapsing backward.
Alright! Using a tilt-shift lens or shooting from a vantage point that maintains your camera level with the subject will help you prevent this even if some editing tools can help fix this.
6. Use a Wide-Angle Lens
One of the most common and useful tools in cityscape photography is the wide-angle lens. Why? Well, think about it—when you’re in the middle of a city, everything is huge and space is often tight.
A wide-angle lens allows you to fit more of the scene into your frame, which is essential when you’re trying to capture a sprawling city skyline or a bustling street scene.
Wide-angle lenses also have this amazing ability to create a sense of depth in your photos. You can play around with the near-far effect, where you have something in the foreground and something else in the background, giving your image layers that make it more interesting.
Without this effect, your photos might feel a bit flat, especially if there’s only one subject in the frame. So, if you want your cityscapes to have that wow factor, a wide-angle lens is your best friend.
7. Use a Telephoto Lens

On the flip side, a telephoto lens can work wonders for your cityscape shots too, but in a completely different way. While wide-angle lenses help you capture the grandeur of a scene by adding depth, telephoto lenses do the opposite—they compress the elements in your photo, bringing everything closer together.
This compression effect can create some stunning compositions, especially when you’re shooting from a distance. Imagine standing on a hill or at a park overlooking the city.
You can use a telephoto lens to focus on specific buildings, bridges, or landmarks, and it’ll feel like they’re stacked on top of each other in a visually powerful way. Plus, telephoto lenses allow you to isolate particular subjects, which can be really useful when you’re trying to focus on a single part of a busy scene without including all the surrounding clutter.
8. Shoot During Blue Hour
If there’s one piece of advice that’ll instantly elevate your cityscape photos, it’s this: shoot during the blue hour. But what exactly is the blue hour, you ask?

It’s that magical window of time just after sunset but before it’s completely dark—about 45 minutes where the sky takes on a deep, rich blue color, and the city lights begin to twinkle.
During the blue hour, you get the best of both worlds: there’s still enough natural light to see the city, but the artificial lights from buildings, street lamps, and cars add that extra sparkle to your photos.
The lighting during this time is soft and even, making it perfect for capturing detailed cityscapes without the harsh shadows that you’d get during the day or the deep contrasts of nighttime. So, if you’re looking to create dramatic, atmospheric shots, the blue hour is when you want to be out there with your camera.
9. Use Leading Lines

Last but certainly not least, let’s talk about leading lines. This is a classic photography technique, but it’s especially powerful in cityscape photography.
Leading lines are elements in your photo that draw the viewer’s eye toward the main subject. Think of streets, bridges, railings, or even the light trails from cars at night—these lines guide the viewer’s attention through the photo, making it more dynamic and engaging.
When done right, leading lines can make your photos feel more immersive. For example, a road that leads straight toward a towering skyscraper will naturally pull the viewer’s eye into the scene and right up to the building.
It’s a subtle but effective way to add depth and direction to your images, making them more captivating and helping to tell a story within the frame.
Conclusion
Cityscape photography is a rewarding genre that offers endless possibilities for creativity and expression. By mastering these cityscape photography tips, you’ll be able to capture urban environments with precision and artistry.
From ensuring straight lines and using the right lenses to shooting during blue hour and planning your shots meticulously, these techniques will help you elevate your cityscape photography to new heights.

