Hey guys! So, you’re getting into photography, huh? That’s awesome! It can feel like a whirlwind of technical terms, gear choices, and creative ideas when you’re just starting out.
But don’t worry—I’ve got your back, I’m here to walk you through some of the basics of beginning photography equipment in a way that won’t make your head spin. Let’s take it step by step, starting with the heart of your kit: the camera.
We’ll also talk about all of equipment you need for starting a photography hobby, so lets talk about it.
The Camera
Okay, here’s the deal: The camera is your main tool as a photographer. It’s literally the core of everything. Now, you’ve probably heard a lot of chatter about mirrorless vs DSLR cameras.
Honestly, both are great, but if you’re just starting and on a budget, a DSLR might be your best bet.
Why? Well, it’s pretty simple, you can get used DSLR gear (like bodies and lenses) for much less than you’d spend on newer mirrorless equipment. Sure, mirrorless cameras are becoming more popular, and they have some cool advantages, but as a beginner, you’ll find that older DSLRs still offer solid performance at a better price.
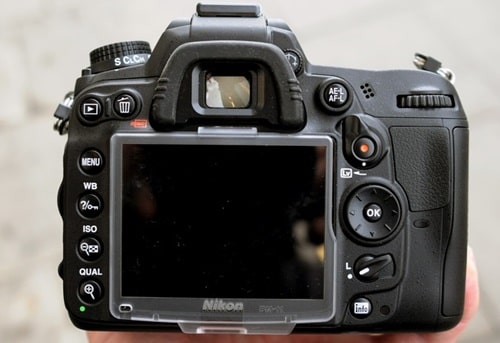
For example, the Nikon D7000, it’s my personal recommendation for anyone getting serious about learning photography. Yes, it’s an older model, but that doesn’t mean it’s outdated.
In fact, it’s perfect for someone who wants a camera with a bit of a learning curve and room to grow. The D7000 has some extra features—like additional dials for quick settings adjustments—that you won’t find in most entry-level cameras.
These are things you’ll really appreciate once you start understanding how different settings impact your photos.
Now, if you’re looking for something even simpler, the Nikon D3300 is also a great option. It’s user-friendly, has excellent image quality, and it’s easier to learn on.
But, if you’re eager to get into more advanced techniques later on, the D7000 will give you more flexibility in the long run.
Lenses
If your camera is the heart of your gear, the lens is like its eyes. The job of a lens is to focus light onto the camera sensor, which means choosing the right lens can make a massive difference in how your photos turn out.
But if you’re new to all this, figuring out which lens to buy can feel a bit like navigating a maze.
Most cameras come with a kit lens (typically an 18-55mm zoom lens), which is fine to start with. But trust me, after a while, you’ll want to move on to something sharper and more versatile. My advice? Look into prime lenses or third-party lenses if you want better quality without breaking the bank.
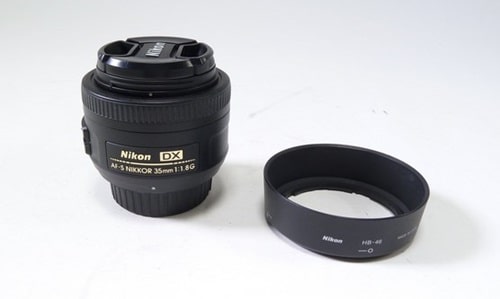
One of my all-time favorites for beginners is the Nikon 35mm f/1.8 DX lens. Why? Well, first off, it’s sharp—really sharp. It’s also small, lightweight, and super affordable at under $200.
This lens is perfect for street photography, portraits, or just capturing everyday moments with beautiful background blur (that dreamy “bokeh” everyone loves). It’s the kind of lens that’ll grow with you as you learn more about composition and lighting.
If you’re feeling a bit adventurous and want to add another lens to your collection, check out the Sigma 17-50mm f/2.8 OS. It’s a zoom lens, so you can go from wide-angle shots to close-ups without changing your lens.
Plus, it’s got image stabilization to help you get clear photos even in low light. This lens will cost a bit more, but it’s worth every penny, especially if you find yourself shooting in different environments.
The Tripod
You might be wondering, now, “Do I really need a tripod?” And really, the type of photography you wish to do will determine the response. The truth is, though, a tripod can be a game-changer particularly for long exposures, night photography, or landscape shots.
Many beginners get the least expensive tripod they can locate only to discover later on that it is more trouble than benefit. A poor tripod can be simply annoying to use, difficult to put up, and unsteady. For this reason I advise starting with a good tripod.
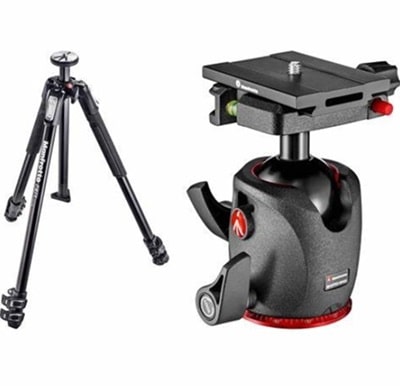
Beginners would find the Manfrotto MT190X3 to be among the better choices. It won’t come apart after a few usage, is strong and dependable. Indeed, it costs a little more at about $150, but this is a piece of equipment that will last years.
Plus, it’s light enough to carry about without aggravating your back—always a perk. You will discover over time whether the kind of photography you perform calls for a tripod. If you are going to get one, though, be sure it is something you will not constantly want to leave at home.
Software
You now have your camera, lens, and tripod; now, what? You will therefore want to process and edit those incredible images after you have taken them. Photo editing tools then become really important.
Though there are many choices available, two of the most often used apps are Capture One Pro and Adobe Lightroom. Though they have distinct pricing tags and capabilities, both are great for editing and organizing your pictures.
For novices, I would advise Lightroom, its easy to use and loaded with all the tools you will need to start editing professionally. Lightroom simplifies and guides your work whether you are changing exposure, modifying colors, or cropping pictures.
While some claim Capture One Pro is preferable for advanced photographers, Lightroom will work just well unless you are working on quite specific editing requirements.
Though you might be tempted to go all out and acquire Photoshop, you most likely won’t need it unless you intend to conduct significant graphic design or photo alteration. Less pricey, lightrooms are far more photography-oriented and user-friendly than others.
Trust me; stick with Lightroom for now; soon you will be elegantly altering your images.
Lighting
Alright, let’s start with lighting—one of the most important—and occasionally disregarded elements of photography. I am aware; natural light is free, right? Why therefore should one concern additional lights?
Trust me, though, once you start playing with various lighting configurations, you will find how much they improve your images.
Although adding flashes or external lights to your kit seems daunting as a novice, you should not go crazy. One good beginning point is a flash, sometimes known as a speedlight.
Now, you don’t have to fork out hundreds of dollars for a name-brand flash like Nikon’s or Canon’s. Excellent outside brands abound that accomplish the task without resorting to cheap tactics.
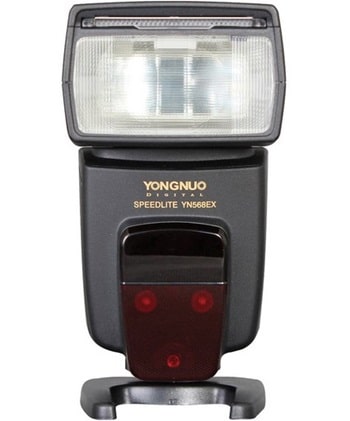
For off-camera settings, for example, the highly rated Yongnuo YN-568EX offers automated TTL (Through The Lens) capability, thereby varying the flash output depending on the scene. The worse is that it runs about $105.
Given the features it presents, that is a great deal. Unlike the built-in flash on your camera, which often leaves your subjects looking flat and washed out, this flash will allow you far more control over your lighting.
Still hold on, though! Not yet go shopping for plenty of costly accessories, starting a studio requires no complete setup. Starting your experiments with light just requires a basic flash and some light modifiers—such as a reflector or diffuser.
Reflectors, for instance, reflect light back onto your subject, therefore lowering shadows and producing a more balanced image. They may drastically improve the quality of your pictures and are rather reasonably priced.
Learning lighting mostly requires practice at the end of the day. Start small, experience how light interacts with your subject, and then progressively expand your equipment.
Whether you are photographing still life, portraiture, or even outdoor situations, you will quickly see how important lighting is to making your photographs pop.
Filters
Let us then discuss filters next, I am not now referring to the Instagram type, although if those are also enjoyable. I’m referring to physical filters you put on your lens to improve your images in ways that software cannot usually duplicate.
Particularly if you enjoy landscape photography, hands down one of the most helpful instruments in a photographer’s toolkit is the polarizing filter. Think water, glass, or even wet roads; this filter lessens glare from reflecting surfaces and can deepen and brighten your sky.
It also helps to eliminate haze, therefore enhancing the clarity and definition of far-off mountains or buildings.
Picture yourself on a sunny day shooting a lake. The surface of the lake might cause a lot of glare without a polarizing filter, which would take attention away from the scene’s inherent beauty.
But you can cut through that glare with the filter, catching the rich colors and subtleties beneath.
Polarizing filters have the major advantage in simplicity of use. All you have to do is screw it on the front of your lens and turn it till the desired effect results.
Remember that your lens may affect the size of these filters; so, make sure you obtain the appropriate one. For a lens with a 72mm front ring, for instance, you will want a 72mm polarizer.
Now, there are other filters out there, like ND (Neutral Density) filters, which let you shoot at slower shutter speeds in bright circumstances (excellent for capturing silky smooth water effects), but for beginners the polarizing filter is probably the most useful and flexible.
If you film a lot of outdoor scenes—especially those involving landscapes and nature—you will wonder how you could have survived without one.
Memory Card
Let’s discuss the vitally vital but sometimes overlooked memory card. You do, after all, need somewhere to keep all those lovely pictures you intend to take!
Particularly with speed and storage capacity, selecting the correct memory card can significantly affect things.
Most cameras these days run on SD cards, hence if you are filming with something like the Nikon D7000, you have the choice to use two cards simultaneously. Once the first card fills up, you can have one card designated as a backup or have it automatically switch over.
This is quite convenient. Having that second space is a lifeline if you have ever lost pictures because of a corrupt card; you know how terrible that can be.
Especially if you are shooting in RAW format, which uses more capacity than JPEG files, I advise obtaining at least a 32GB card.
Brands like PNY Technologies have outstanding cards at reasonable rates; consider a 32GB card for about $20. For dependable storage capable of handling big file volumes, that’s a quite great value.
Still, it goes beyond mere storage capacity, speed also counts. Particularly if you intend to shoot in burst mode or record films, seek for cards with a fast write speed (measured in MB/s).
Faster cards will guarantee that your camera can rapidly write the photographs to the card, thereby avoiding any unpleasant lag during the shooting.
Also, treat yourself by getting a few of memory cards. You want to avoid running out of room while caught in the middle of a shot.
Moreover, having an additional card on hand helps one to relax. Trust me; once you start stuffing those cards with amazing pictures, you’ll be happy you’re ready!
The Battery
Last but most definitely not least are batteries. This one makes sense right away. You are essentially stranded if your camera runs out of midst of a shot juice.
Having a spare battery—or two—is therefore absolutely vital, particularly if you intend to do longer shots or travel with your camera.
Now, you could be tempted to save a few bucks by obtaining third-party batteries; while some are good, I would advise staying with brand-name batteries, particularly with regard to your camera.
Sometimes inexpensive off-brand batteries produce issues such not holding a charge as well or even malfunctioning. Given something as crucial as power, you want not to gamble it. A Nikon-brand battery may cost a bit more, but it’s worth it for the reliability.
Even if you use the LCD screen a lot or shoot in high-resolution RAW format, having two completely charged batteries will help you get through a full day of shooting if you have a Nikon D7000 or another similar camera.
And let me tell you, having to discover your battery is dead and you have no backup after arriving at a stunning site or once-in- a-lifetime event. Always be ready; let that not happen to you.
If you believe you will be away from power for a lengthy period, a wise habit is to charge your batteries the night before a shoot and pack a portable charger. This ensures that you will always be ready to record those amazing events free from concern about running out of battery.
Conclusion
So there you have it, friends! That’s a solid breakdown of the core photography gear you’ll need as a beginner. As you get more comfortable with your camera and lenses, you’ll figure out which accessories are worth investing in and which ones you can hold off on. But for now, with a decent camera, a sharp lens, a sturdy tripod, and some editing software, you’re all set to start capturing the world through your lens.
